The human body is very sensitive to the gain and loss of heat making comfort elusive, especially during summer and winter months. To make our homes a comfortable space to live in, we install cooling and heating systems, ventilation, insulation, and other features to protect us from drastic changes in temperature. HVAC systems combine all of these features into a single, all-in-one system, and controlled by one of its most essential components, which is the thermostat – a device that monitors your indoor temperature to provide greater control over the temperature setting.
With a thermostat installed, you won’t need to worry about being too hot or being too cold. It's an important part of a lot of homes providing comfort to each member of a household.
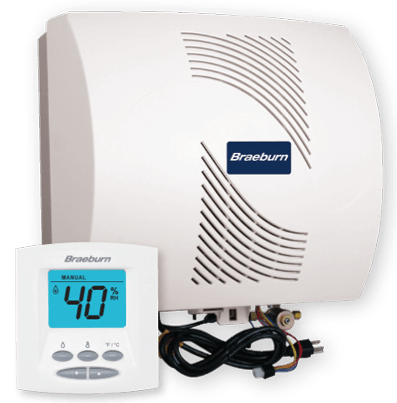
What is a Braeburn Thermostat?
Braeburn is a company based in Montgomery, Illinois which manufactures high quality digital electronic and electro-mechanical thermostats, zoning systems, air filtration products, humidification, and various accessories for installation by professional contractors worldwide. They are committed to increasing comfort in any home or business environment while lowering energy costs.
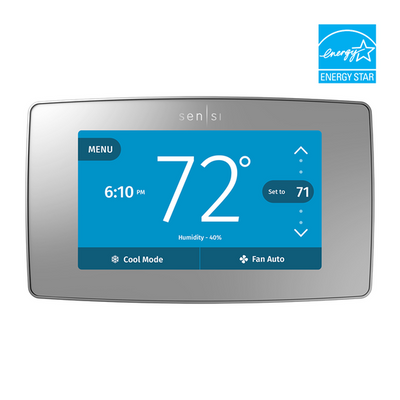
If you are looking for a thermostat for your next electrical project, visit Blackhawk Supply and choose from their selection of Braeburn HVAC thermostats. They have thermostats with zone control panels allowing you to divide your home or office into zones for better distribution of energy; thermostats with touchscreens so you can change or schedule the temperature you want with ease and Wi-Fi enabled thermostats allowing you to monitor the temperature of your home remotely through your mobile devices.
Shop for hundreds thermostat models today at Blackhawk Supply store!
BROWSE THERMOSTATS

The Installation
The Braeburn thermostat should only be installed by professional service technicians. This is to ensure that your device will work effectively and efficiently while minimizing the risk of accidents and damages to your property. Improper installation can cause electric shocks, blowing a circuit breaker and damage to your cooling and heating systems as well as the thermostat unit itself.
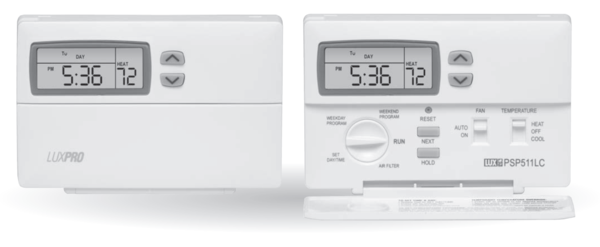
The Set Up

After your thermostat have been installed by professionals, you will now need to program it to your desired settings.
Step 1 - In a normal operating mode, press the DAY/TIME button on the keypad to set the day and time of your thermostat.
- Press the up and down arrows to adjust the hour then press DAY/TIME when done.
- Press the up and down arrows to adjust the minute then press DAY/TIME when done.
- Press the up and down arrows to adjust the day of the week.
- Press RETURN to exit.
Step 2 - Press the FAN button repeatedly to scroll through the different modes.
- In the AUTO mode, the fan will only run when the heating or cooling units are running.
- In the ON mode, the system fan stays on continually.
- In the CIRC mode, the fan will run intermittently to help circulate air and provide more even temperatures when the heating or cooling system is not active.
- In the PROG mode, the fan turns on depending on how it was programmed.
Step 3 - Press and hold the RETURN button for approximately 3 seconds to access the User Options menu.
- Press the up and down arrow buttons to change the setting for the displayed User Option.
- The first stage differential determines how much the room temperature must change from the set temperature before heating or cooling must be initiated.
- Second and third stage differentials are only available on the 2220 models and can be set the same way.
- Press RETURN to exit when you have made the necessary changes.
Programming a 7-day Schedule
Here’s the thing with thermostats - the more you fiddle with them, the more power they consume. Blackhawk Supply’s programmable thermostats get rid of this problem because they enable you to program seven days’ worth of settings to maximize energy savings.
Here’s how to program your Braeburn thermostat for a 7-day residential schedule. Take note that setting all 7 days at once will copy over any previously programmed individual days
- Press the PROG button for approximately 3 seconds to switch to SpeedSet programming mode.
- Press SYSTEM to choose from the HEAT or COOL modes.
- Press the up and down arrow buttons to adjust the hour for the MORN (morning) event then select NEXT.
- Press the up and down arrow buttons to adjust the minute for the MORN event then select NEXT.
- Press the up and down arrow buttons to adjust the temperature for the MORN event then select NEXT.
- Repeat steps 3 to 5 for the DAY, EVE and NIGHT events.
- Press RETURN to exit.
If you prefer to set individual days, you can do so by doing the following:
- Press the PROG button to switch to programming mode. On the screen, M (Monday) will be displayed and the hour will be flashing.
- Press SYSTEM to choose from the HEAT or COOL modes.
- Select DAY/TIME to choose the day you would like to program.
- Press the up and down arrow buttons to adjust the hour for the MORN (morning) event then select PROG when done.
- Press the up and down arrow buttons to adjust the minute for the MORN (morning) event then select PROG when done.
- Press the up and down arrow buttons to adjust the temperature for the MORN (morning) event then select PROG when done.
- Repeat steps 4 to 6 for the DAY, EVE and NIGHT events.
- Press RETURN to exit.
Resetting the Thermostat
If you want to reset all of your settings and programming, use a small, thin object such as a toothpick or a paperclip and gently press the button inside the small hole at the front of the thermostat which is labeled “reset”.
Changing the Batteries of the Thermostat
Your Braeburn thermostat will come pre-equipped with two AA type alkaline batteries. When the batteries become low, a low battery indicator will appear in the display. To change the batteries, you should:
- Remove the thermostat outer case by gently pulling it from the base.
- Remove the old batteries and replace with the new ones. Make sure that they are positioned properly.
- Gently push the thermostat's outer case back onto the base.
Cleaning the Thermostat
Spraying any liquid on the thermostat is not advised. Use a soft, damp cloth to wipe the outer body of the device. Never use any abrasive cleansers to clean your thermostat.